Stepping in front of a mirror only to see hollow eye sockets and pronounced under-chin dark spots ruins your morning routine. Most homeowners blame their skin or makeup, but the real culprit is poor fixture geometry.
Mastering proper bathroom vanity lighting placement to prevent facial shadows requires treating your mirror like a photographer treats a portrait studio. Downward beams create steep facial ravines. Balanced, horizontal cross-illumination erases them completely.
HARSH OVERHEAD BALANCED CROSS-LIGHT
[ Ceiling Downlight ] (Eye-Level Sconces)
|
| (Steep Angle) [Sconce] [Sconce]
v \ /
(Deep Eye Hollows) \ Fill Light/
(Nose Trough Shadow) v v
(Under-Chin Dark Zone) [ Balanced Face ]
The Geometry of Facial Shadows: Why Downlights Fail

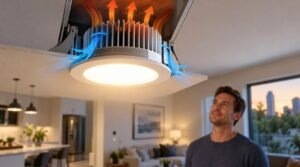
For years, building contractors threw an inexpensive recessed can directly above the center of the bathroom sink. That single choice creates an optical disaster. Light travels in straight lines. When a high-output source beams down at a 45-degree angle from the ceiling, any protruding facial feature—brow bones, nose, lips—casts an immediate, high-contrast shadow directly underneath it.
This directional flaw is why makeup applies unevenly and shaving leads to missed patches along the jawline. To eliminate harsh shadows, we must alter the angle of incidence. The human face requires horizontal, eye-level illumination that fills recesses instead of carving them out.
The Cross-Illumination Blueprint: Eye-Level Sconces
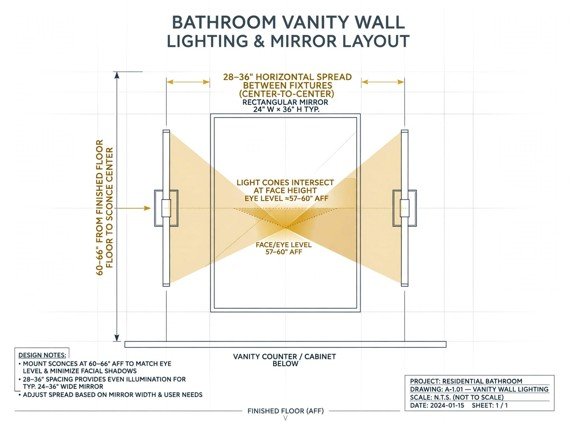
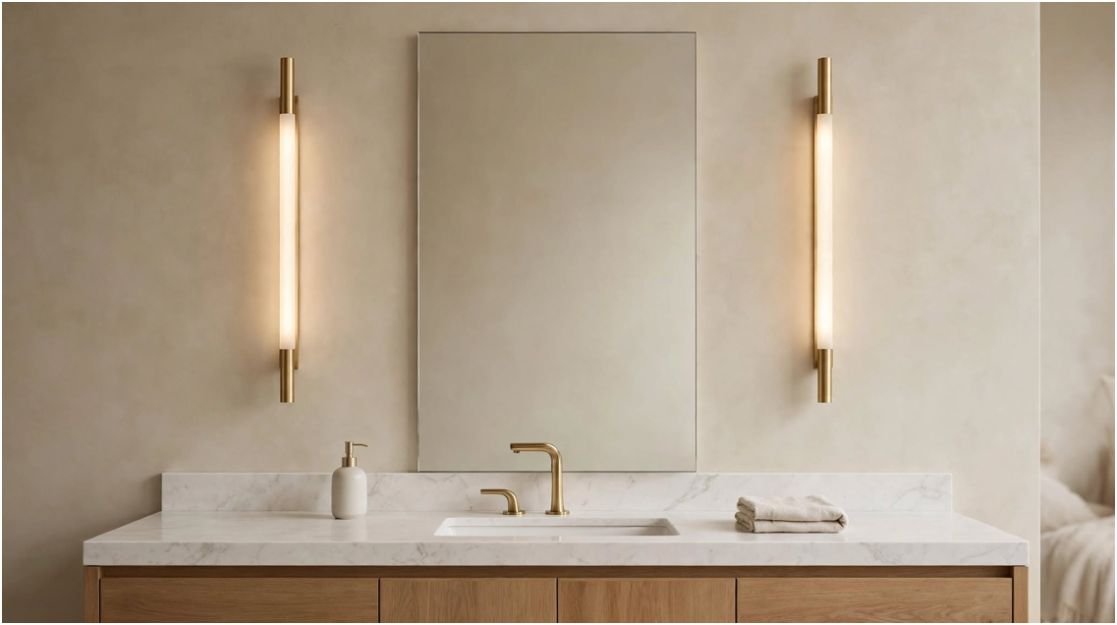
The gold standard for any grooming station is dual-sconce placement flanking the mirror. This configuration provides true cross-illumination. The left sconce fills the shadow cast by the right, and vice versa.
+—————————————————-+
| |
| WALL SCONCE INSTALLATION |
| |
| [Sconce] +——————+ [Sconce]
| | | | |
| | | MIRROR | |
| o <=======>| |<=======>o
| Center +——————+ Center
| | |
| | <————- 28″-36″ ————-> |
| | |
| v v
| 60″-66″ Above Finished Floor (AFF) |
+—————————————————-+
Height and Spacing Calibration
When positioning junction boxes on bare studs, standard rough-in heights frequently miss the mark. Aim for these specific dimensional tolerances:
| Parameter | Optimal Dimension | Tolerance Range | Functional Objective |
| Mounting Height (Center) | 64 inches AFF | 60 to 66 inches | Centers the optical core at average adult eye level |
| Horizontal Spread | 30 inches apart | 28 to 36 inches | Prevents beam drop-off at the center of the face |
| Clearance to Mirror | 3 inches | 2 to 4 inches | Minimizes glass reflection glare while keeping spread tight |
Mounting the center of your sconces between 60 and 66 inches from the finished floor keeps the light source parallel to your eyes. If multiple people of drastically different heights share the sink, choose vertical tubular sconces measuring 14 to 18 inches in length. These longer diffusers project an extended vertical band of light that flatters both a 5-foot-2 and a 6-foot-2 face.
The Nose Bridge Differential Test
During remodels, I use a quick diagnostic to test beam convergence before closing the drywall: the Nose Bridge Differential Test.
Stand centered at your intended vanity position and hold a standard pencil vertically against your nose bridge under temporary work lights. If the pencil casts a distinct dark shadow across either cheek, your sconces sit too far apart or too far back. When your fixtures sit at the proper 28- to 36-inch spread, both side beams intersect across your facial plane. The shadow of the pencil softens into near-invisibility.
Working Around Architectural Hurdles: Tight Walls and Double Sinks
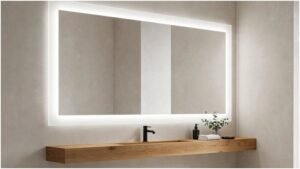
Not every bathroom layout offers sufficient drywall on either side of the glass. Tight powder rooms, wide medicine cabinets, and dual-basin vanities introduce physical constraints that complicate indoor lighting placement.
TIGHT SPACES: HIGH-CRI INTEGRATED LED MIRROR
+————————————————+
| +—————————————-+ |
| | #################################### | | <– Perimeter
| | # # | | Frosted Strip
| | # DIRECT FACE-LEVEL # | |
| | # DIFFUSED BEAM # | |
| | # # | |
| | #################################### | |
| +—————————————-+ |
+————————————————+
High-CRI Integrated Perimeter Mirrors
When side clearances are under four inches, abandon wall sconces entirely. Cramming a sconce flush into a drywall corner bounces light into the adjacent wall, causing erratic peripheral glare.
Choose a commercial-grade integrated LED mirror instead. According to lighting performance data from the Energy Star (EPA), edge-lit mirrors equipped with continuous forward-facing diodes project balanced planes of light straight outward.
Look for models featuring inward-facing frosted bands set at least two inches inside the glass perimeter. This detail prevents side-spill while enveloping your face in clean light.
Over-Mirror Light Bar Positioning
If your plumbing and framing lock you into an over-mirror fixture, avoid downward-aimed cup shades. A narrow top fixture behaves just like a ceiling downlight.
| Fixture Choice | Downward Shadow Risk | Visual Comfort | Recommended Fix |
| Exposed Edison Bulb Bar | Extreme | Severe glare | Replace with frosted globes |
| Downward Cone Spotlights | High | Deep socket shadows | Invert shades upward or switch fixture |
| Linear Opal Glass Bar (30″+) | Minimal | Diffused, uniform | Mount 78″ to 80″ AFF with wide throw |
Select a linear bar that spans at least 65 to 75 percent of the mirror’s total width. Mount the center of the backplate between 78 and 80 inches from the floor, and choose a fixture with an opal or dense milk-glass shade that diffuses light outward in a 180-degree arc rather than funneling it straight downward.
Layering Task and Ambient Zones for Balanced Fill
Vanity lights cannot carry an entire room alone. Turning on high-output sconces in a pitch-black bathroom creates extreme contrast, causing your pupils to contract. As research compiled by the Cleveland Clinic demonstrates, high visual contrast strains optical muscles and prompts premature eye fatigue.
BALANCED TWO-ZONE CROSS SECTION
[ Ambient Recessed Can ]
(Ceiling)
|
| ~20″ Offset from Wall
v
(Fills Crown/Shoulders)
\
[ Vanity Wall ] \
| v
[Sconce] ——> (Horizontal Task) [ User ]
|
[ Mirror ]
Anchor your setup with a dedicated ambient ceiling fixture set roughly 20 inches back from the wall. This fills the crown of the head and shoulders, working in tandem with the sconces to completely envelop your reflection.
Bulb Metrics: Beyond Physical Fixture Placement
Flawless physical placement cannot compensate for poor bulb optics. The spectral quality of your light determines how skin textures, veins, and pigments register in the mirror. Design standards from the Illuminating Engineering Society (IES) emphasize strict control over both color temperature and color fidelity in personal grooming zones.
LIGHT SPECTRUM & COLOR QUALITY TARGETS
CRI: [ 70 CRI (Dull/Gray) ] ===> [ 90+ CRI (True Tone Target) ]
CCT: [ 2200K (Too Orange) ] ===> [ 2700K-3000K (Sweet Spot) ] ===> [ 5000K (Too Clinical) ]
- Color Rendering Index (CRI): Use bulbs with a 90+ CRI rating (R9 score greater than 50). Cheap 80-CRI LED chips lack the red spectrum, leaving skin looking sallow and dull.
- Correlated Color Temperature (CCT): Select 2700K for traditional warmth or 3000K for modern, clean white. Avoid 4000K to 5000K daylight bulbs; they read as harsh, institutional, and unflattering in residential bathrooms.
- Diffuser Glass Quality: Use only acid-etched, satin, or opal glass shades. Clear glass exposes raw filaments, creating point-source glare that pierces your peripheral vision.
Designers frequently balance these technical metrics alongside room aesthetics. As highlighted in layout breakdowns by Architectural Digest, treating the vanity as an integrated lighting system—rather than an isolated decorative accent—yields the most functional results.
Ditch the Shadows, Keep the Drama
Ditch the harsh downward spotlights and treat your vanity like the high-precision grooming zone it is. Set your junction boxes at eye level, keep your sconces between 28 and 36 inches apart, and back them up with dense, diffused glass.
Once you balance horizontal task beams with soft ambient ceiling fill, you will finally see a clean, true-to-life reflection every single morning.
Frequently Asked Questions
1. What is the ideal mounting height for vanity sconces?
Install the center of the fixtures between 60 and 66 inches above the finished floor to keep the light source level with your eyes.
2. How far apart should side sconces be placed on a mirror?
Space them 28 to 36 inches apart to ensure the horizontal beams overlap across the center of your face.
3. Can an overhead light bar prevent facial shadows?
Only if it measures at least 24 inches wide, uses heavy opal diffusion, and mounts between 78 and 80 inches high to scatter light broadly.
4. What bulb temperature works best for vanity mirrors?
Choose 2700K to 3000K LED bulbs with a 90+ CRI rating to achieve warm, natural, and accurate skin tones.