
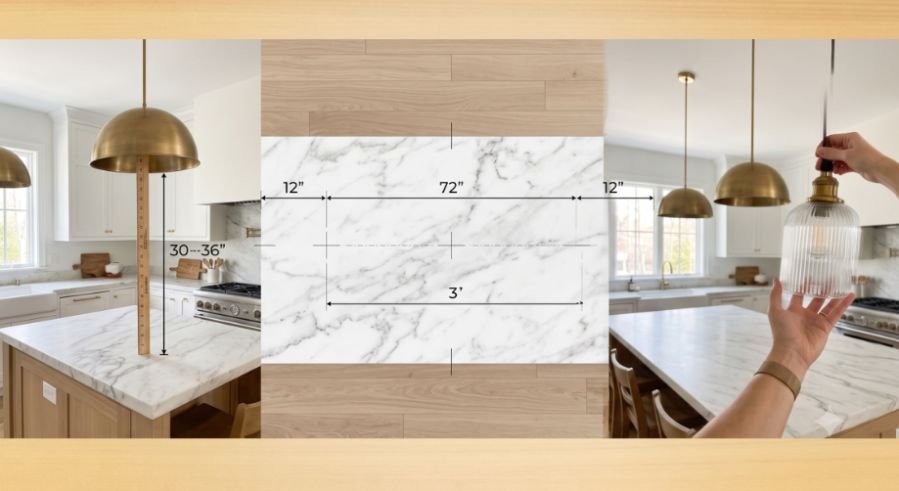
Few design errors spoil an open-concept remodel faster than pendant lights hung at eyeball level or spaced like an afterthought. I learned this the hard way on a past remodel: after blindly following the builder’s ceiling marks, my fixtures ended up obstructing sightlines to the living room and casting harsh shadows over the prep sink.
Getting your lighting right requires balancing task illumination, human scale, and architectural proportions. This kitchen island pendant light spacing and height guide eliminates the guesswork so you can lock in your layout before drilling into the drywall.
The Standard Hanging Height: Measuring for Sightlines and Function
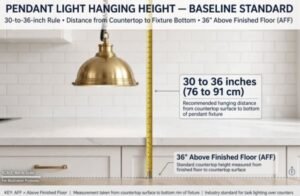
The baseline rule for pendant drop is simple: measure 30 to 36 inches from the top of the island countertop to the lowest rim of the fixture.
CEILING
|
[Downrod/Cord]
|
+———+
| Fixture |
+———+
|
30″ to 36″ (Clearance)
|
======================= <- Island Countertop (36″ AFF)
This clearance keeps the bottom rim roughly 66 to 72 inches above the finished floor (AFF) on a standard 36-inch-high counter. That zone creates an unobstructed field of vision. When standing, your eye level typically rests between 58 and 64 inches; when seated on a 24-inch counter stool, your eyes sit near 46 to 48 inches.
The Illuminating Engineering Society (IES) advises that kitchen task surfaces require uniform illumination without direct line-of-sight view into raw diode glare. Keeping the bottom edge above 30 inches preserves natural eye contact across the counter while concentrating light right where your chef’s knife hits the cutting board.
Adjusting for High Ceilings and Tall Household Members
Standard 8-foot and 9-foot ceilings handle a 30- to 32-inch clearance without visual strain. Once your ceiling climbs to 10 feet or beyond, however, pendants hung at 30 inches can look like isolated buoys adrift in empty vertical volume.
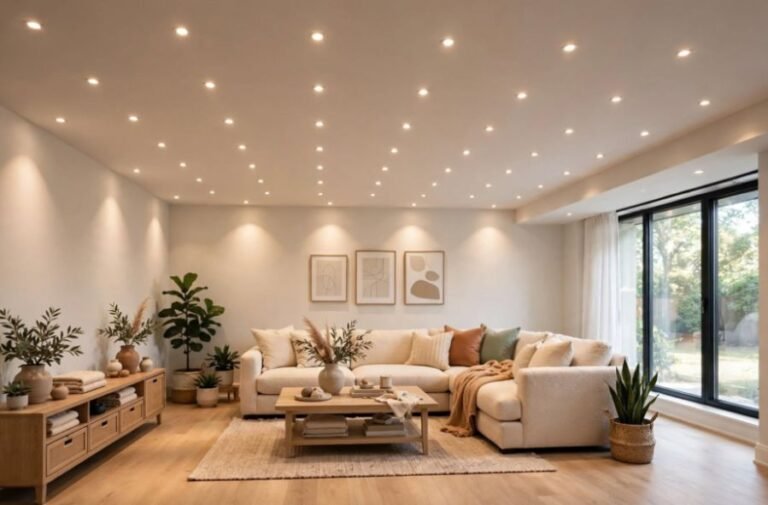
In rooms where you cannot rely on a central ceiling fixture, you can instead light a living room with no overhead lighting by combining floor lamps, wall sconces, and ceiling-bounce techniques.
For every foot of ceiling height over 9 feet, raise your fixture by 2 to 3 inches. In a room with 10-foot ceilings, target 33 to 35 inches above the counter.
Household ergonomics also matter. If anyone in your family stands 6 feet or taller, shift toward the top end of the band—34 to 36 inches. This slight lift keeps the lower rim out of their direct line of sight when chopping vegetables.
Accounting for Task Zones, Faucets, and Stool Seating
Never map ceiling boxes without checking your counter’s functional features. A high-arc commercial kitchen faucet can rise 18 to 22 inches above the counter; hanging a low, opaque metal dome directly in front of it creates visual clutter and risks getting splashed.
When your island features an eating bar with overhang seating, walk around the perimeter. Verify that people rising from barstools will not bump into wide metal shades. Maintain at least 66 inches from the finished floor to the fixture base along every seated edge.
Precision Spacing Math: Avoiding the “Drifting Edge” Trap

A frequent layout mistake is spacing pendants evenly across the entire ceiling without checking the clearance at each end. Fixtures placed too close to an island edge look like they are about to slide off the counter.
Always keep the outer edge of your light fixtures at least 12 to 15 inches inward from the left and right countertop edges. From there, calculate your junction box centers mathematically using clear zones.
|<– Margin –>| (Pendant 1) |<—- Center Gap —->| (Pendant 2) |<– Margin –>|
+———————————————————————————–+
| KITCHEN ISLAND |
+———————————————————————————–+
The 2-Pendant Layout Formula
Use two pendants for islands measuring 4 to 6.5 feet in length. The cleanest method divides the entire island span into equal thirds:
$$\text{Pendant Center Location} = \frac{\text{Total Island Length}}{3}$$
Take an 72-inch (6-foot) island:
- Divide 72 by 3 to get 24 inches.
- Place the center of your first pendant 24 inches from the left edge.
- Place the center of the second pendant 24 inches from the right edge.
- The gap between the centers of both pendants will automatically equal 24 inches.
This formula guarantees balanced negative space across the counter surface.
The 3-Pendant Layout Formula
For islands running 7 to 10 feet long, three pendants provide balanced rhythm and eliminate dark center zones. The easiest layout divides the run into equal quarters:
$$\text{Pendant Center Interval} = \frac{\text{Total Island Length}}{4}$$
On a 96-inch (8-foot) island:
- Divide 96 by 4 to get 24 inches.
- Locate Pendant 1 at 24 inches from the left edge.
- Locate Pendant 2 dead center at 48 inches.
- Locate Pendant 3 at 72 inches (24 inches from the right edge).
- Each fixture sits exactly 24 inches apart on center.
If you choose wide shades (such as 14-inch domes), verify that the space between shade edges remains at least 10 to 14 inches. When shades sit closer than their own diameter, the ceiling starts feeling like a solid wall of metal or glass.
Sizing Fixture Proportions Against Counter Dimensions

Spacing math only works when your fixture scale suits the cabinetry underneath. Small 6-inch mini-pendants look lost over a deep quartz waterfall slab, while massive 20-inch brass bells overwhelm a modest prep space.
+—————————————————+
| Island Length | Fixture Count | Recommended Dia |
|—————–|—————|—————–|
| 4 to 5 feet | 1 – 2 | 8″ – 11″ |
| 6 to 7 feet | 2 | 12″ – 15″ |
| 8 to 9 feet | 3 | 11″ – 14″ |
| 10+ feet | 3 – 4 | 14″ – 18″ |
+—————————————————+
Width and Visual Weight Rules
Adhere to the depth constraint recommended by the National Kitchen and Bath Association (NKBA): subtract 12 inches from the total depth (front-to-back) of your counter. The resulting figure is the absolute maximum diameter for your shades. Over a standard 36-inch-deep island, limit shade widths to 16 inches or less.
Also evaluate visual density alongside raw dimensions:
- High visual weight: Solid iron, ceramic, dark brass, or painted metals block light and create bold silhouettes. Scale these toward the smaller end of the spectrum.
- Low visual weight: Clear ribbed glass, spun acrylic, thin wire cages, or open lantern frames let sightlines pass straight through. You can size these 2 to 3 inches wider without crowding the room.
If you already use an under-cabinet task lighting guide to brighten perimeter counters, match your island fixture silhouettes to those complementary metals and accents.
Color Temperature, Lumens, and Dimming Controls
Great placement falls flat if the light itself feels harsh or weak. A kitchen island requires distinct lighting moods: intense clarity during food prep and warm ambience when friends gather around drinks.
- Target 3000K Color Temperature: While 2700K can skew too yellow for prep work and 4000K can feel starkly clinical, 3000K hits the sweet spot for kitchen islands. It keeps food looking appetizing while revealing true cutting lines.
- Insist on 90+ CRI (Color Rendering Index): Quality LED bulbs reveal vibrant colors in fresh produce and meats. Avoid cheap retrofit LEDs that wash out your countertop surfaces.
- Lumens Matter More Than Wattage: Aim for 40 to 50 footcandles on the working surface, which translates to roughly 400 to 700 lumens per pendant on multi-light configurations.
- Dedicated Dimmers Are Essential: Connect your island pendants to an independent dimmer switch separate from your ambient room downlights. The Energy Star program maintains compatibility lists matching modern dimmers to specific LED drivers, helping you avoid low-frequency hums or flickers.
When pairing these fixtures with a ceiling grid, use a best indoor lighting placement for low ceiling basements guide to position ambient pot lights behind your head rather than directly above pendants, avoiding harsh overlapping shadows.
Four Common Hanging Blunders and How to Fix Them
1. The Glare Flare
Clear glass globe pendants look stunning in showroom photography, but clear bulbs inside unshaded fixtures can cast blinding glare right into seated guests’ eyes. Solve this by installing dipped silver-bowl bulbs, frosted tubular filaments, or milk-glass globes that diffuse the light.
2. Measuring from Ceilings Instead of Counters
Never use the ceiling as your zero-point datum. Ceilings frequently sag or slope across an 8-foot run. Always pull your tape measure upward from the finished countertop surface to the bottom of the shade rim so all fixtures hang level with the counter.
3. Ignoring the Swing of Cabinet Doors
Before finalizing pendant drops near wall runs, open every adjacent upper cabinet door and appliance front. Ensure refrigerator panels or pantry doors clear the pendant bodies by at least 3 inches.
4. Eyeballing the Rough-In Phase
Electricians often install rough-in junction boxes before island cabinets arrive. Always check that their ceiling boxes center directly on the future countertop center line, not merely the center of the kitchen room floor. Subfloors and framing often drift off true center during construction.
Frequently Asked Questions
1. How high should pendants hang over an 8-foot ceiling?
Hang the bottom of the pendant 30 to 32 inches above the island surface.
2. How do I space three pendants on an 8-foot island?
Divide the 96-inch island into four equal 24-inch segments, placing fixture centers at the 24-inch, 48-inch, and 72-inch marks.
3. Should island lights be centered on the island or the room?
Always center island pendants directly over the island countertop rather than the room footprint.
4. Can two large pendants replace three smaller lights?
Yes, two 14- to 18-inch pendants often look cleaner than three small mini-pendants over a 7- to 8-foot counter.
Dial In Your Hang
Dialing in the right pendant layout is part arithmetic, part personal scale. Don’t commit to electrical holes before mocking up your ideas in real space: cut out cardboard circles that match your pendant diameters and pin them to string taped to the ceiling.
Stand at the island, hold a knife at the cutting board, sit in your counter stools, and check sightlines into adjacent rooms. Once the cardboard mockups disappear from your line of sight while bathing the quartz in even illumination, lock in those measurements and pick up the drill.



2 thoughts on “Kitchen Island Pendant Light Spacing and Height Guide”