I have found that attractive outdoor lighting begins long before anyone installs the first fixture. The position, brightness, beam direction, and purpose of every light affect the final appearance.
Learning how to plan a landscape lighting layout helps you create a yard that feels welcoming and easy to navigate without becoming excessively bright. The following process will help you develop a balanced design that highlights your property’s best features while leaving enough darkness to create depth.
Start by Deciding What Your Outdoor Lighting Must Accomplish
Before buying fixtures, determine why you need outdoor lighting. Most successful designs combine safety, security, function, and visual appeal. Walkways, stairs, entrances, gates, and changes in elevation usually require functional illumination. Trees, stone walls, fountains, sculptures, and architectural details may become decorative focal points.
Consider how you use the property after sunset. A patio may need gentle ambient lighting for conversation, while an outdoor kitchen requires brighter task lighting. Driveways and entrances need clear visibility, but they should not create uncomfortable glare. Defining these priorities prevents you from installing the same type of light throughout the yard.
Draw a Scaled Map of Your Property
Create a basic overhead map using graph paper, a property survey, or a printed satellite image. Mark the house, garage, paths, driveway, deck, patio, garden beds, trees, walls, steps, water features, and other permanent elements.
Add existing outdoor receptacles and the possible transformer location. Measure the approximate distances between these points because cable length affects voltage and wire selection. Draw the primary viewing directions from the street, front windows, patio seats, and entry doors. A fixture that looks hidden from one angle may create glare from another.
Use simple symbols for each proposed fixture and assign every light a number. Consider your outdoor seating ideas as you plan the layout, then record each fixture’s wattage, beam angle, zone, and intended purpose on a separate planning sheet.
Divide the Landscape into Practical Lighting Zones

Dividing the property into zones makes the design easier to control and expand. A typical layout might separate the front entrance, driveway, walkway, architectural facade, backyard patio, and garden.
Give each zone a specific purpose. Functional zones support safe movement, accent zones emphasize selected features, and atmospheric zones establish a comfortable mood. Fixtures serving the same area can often share a cable run or transformer circuit.
Independent controls allow pathway lights to remain active longer while decorative garden lights turn off earlier. Timers, photocells, motion sensors, and smart controls can also reduce unnecessary energy use.
Choose Focal Points Before Adding Path Lights
Select a small number of features that deserve attention. Mature trees, textured walls, columns, fountains, and distinctive plantings make effective anchors.
These features can also inspire practical outdoor lighting ideas for a beautiful backyard, especially when you want to combine focal-point lighting with comfortable areas for entertaining.
Lighting these elements first establishes a visual hierarchy and helps you avoid illuminating everything equally.
Next, address entrances, stairs, walkways, and other safety areas. Add gentle atmospheric lighting to patios and planting beds last. This sequence produces greater depth because accent, task, and ambient illumination work together.
Dark sections are an intentional part of a good design. They create contrast, separate focal points, and keep the property from looking flat.
Match Each Fixture to Its Intended Effect
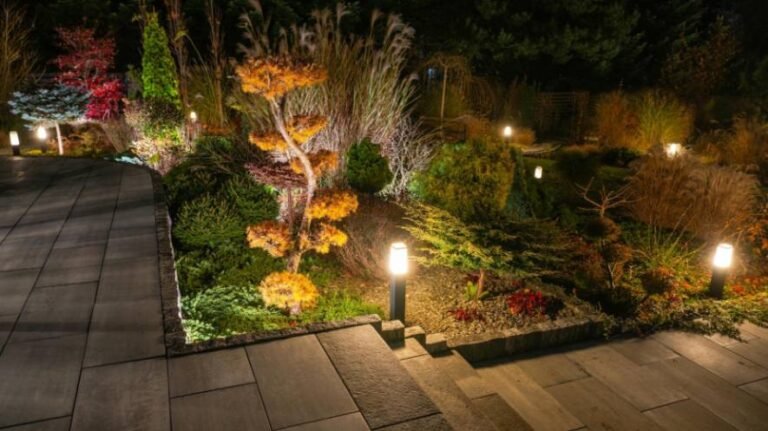
Path lights direct illumination downward and outward across walkways or planting beds. Stagger them on alternate sides instead of placing them in two identical rows. This avoids the runway effect and creates a more natural rhythm.
Spotlights produce concentrated beams for trees, columns, statues, and narrow architectural details. Floodlights cast wider beams across large walls, broad canopies, and open areas. Well lights sit near ground level and can discreetly illuminate trees or facades.
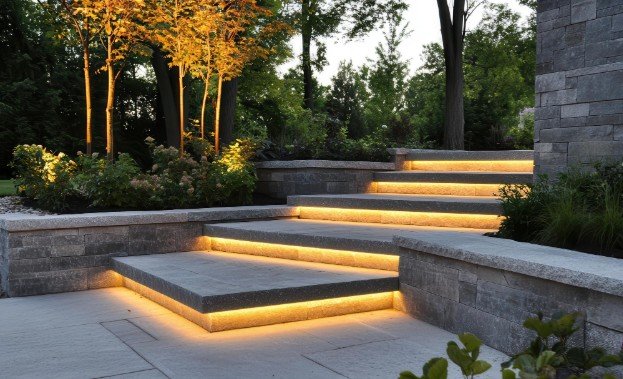
Deck and step lights reveal elevation changes without shining into people’s eyes. Hardscape lights fit beneath caps, benches, or retaining-wall ledges. Downlights mounted above the landscape can imitate moonlight filtering through branches, while grazing lights reveal the texture of brick, bark, and stone.
For decorative areas where you want more color flexibility and dynamic effects, understanding RGBW vs RGBIC LED strip lights can help you choose the right type of LED lighting for the landscape.
Plan Fixture Spacing Around Light Coverage

Path lights often begin approximately 6 to 10 feet apart, but spacing should depend on mounting height, lumen output, path width, and beam spread. The objective is to create gently overlapping pools rather than continuous brightness.
Position an uplight close enough to reach its subject without spilling excessive light into the sky. A narrow beam suits a tall, slender tree, while a spreading canopy or wide wall needs a broader beam. Shielding and careful aiming are more effective at controlling glare than simply choosing a weaker lamp.
Warm LEDs around 2700K to 3000K generally complement foliage, wood, brick, and stone. Keeping color temperature reasonably consistent also makes separate zones feel connected.
Calculate Transformer Capacity and Cable Routes
Add the wattage of every planned low-voltage fixture. Choose a transformer that can support the total load while retaining approximately 20 percent capacity. Extra room accommodates system losses and reasonable future expansion.
Keep cable routes as short and accessible as practical. Extremely long daisy chains can leave the final fixtures noticeably dimmer because of voltage drop. Hub, loop, or branched layouts may deliver more consistent voltage in larger yards.
Place the transformer near a suitable protected outdoor power source and reasonably close to the lighting zones. Cable gauge, burial depth, waterproof connections, and circuit protection should follow the product instructions and applicable local electrical requirements. Contact the relevant utility-location service before digging.
Common Landscape Lighting Layout Mistakes
The most frequent mistake is trying to illuminate the entire property. Uniform brightness removes contrast and makes an outdoor space feel commercial. Using identical fixtures everywhere, ignoring sightlines, mixing unrelated color temperatures, and pointing lights toward neighboring properties also weaken the design.
Other problems include buying fixtures before mapping the yard, undersizing the transformer, creating cable runs that are unnecessarily long, and burying everything before completing a nighttime test. Fixtures should also remain clear of irrigation heads, mower paths, edging tools, and areas that regularly collect water.
Frequently Asked Questions
1. How do beginners learn how to plan a landscape lighting layout?
Begin with an overhead property map. Mark safety hazards, focal points, power access, viewing directions, fixture positions, cable routes, and lighting zones. Test the complete arrangement at night before burying cables.
2. How many landscape lights does a yard need?
There is no universal number. The correct quantity depends on the property’s size, number of pathways, focal points, existing ambient light, and fixture coverage. Starting with fewer lights usually produces a more refined result.
3. Should landscape lights be placed in a straight line?
Straight, symmetrical rows can create a runway appearance. Stagger pathway fixtures and vary accent-light positions while maintaining a deliberate visual rhythm.
4. When should I hire a professional?
Consult a qualified professional when the project involves line-voltage wiring, complex controls, extensive trenching, water features, difficult tree mounting, uncertain code requirements, or significant voltage-drop calculations.
A Better-Lit Landscape Begins with Restraint
I believe the best outdoor lighting reveals the landscape instead of overpowering it. When I prioritize safety, choose a few meaningful focal points, layer different effects, and preserve areas of shadow, the design feels deliberate and comfortable.
A measured plan also makes installation easier, reduces wasted purchases, and leaves room for the system to develop as the landscape changes.