
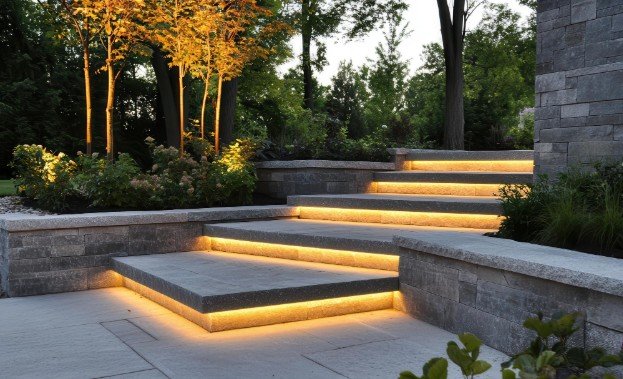
I’ve found that outdoor lighting can change the appearance of a property more dramatically than almost any other weekend improvement. It can guide people along walkways, illuminate steps, highlight trees, and make outdoor living areas feel inviting after sunset. The installation becomes much easier when I plan the complete system before placing the first fixture.
This guide explains how to install low-voltage landscape lighting with the correct transformer, cable, connections, and fixture layout. Although these systems are generally suitable for experienced DIYers, the equipment instructions and local electrical requirements should always guide the final installation.
How Does a Low-Voltage Landscape Lighting System Work?
A typical system uses a transformer to reduce standard household electricity to the lower voltage required by compatible outdoor fixtures. Landscape cable carries power from the transformer to path lights, spotlights, well lights, or other fixtures positioned around the property.
The transformer acts as the system’s power and control center. Many models include a timer, photocell, or smart control that operates the lights automatically. The fixtures connect to one or more cable runs using connectors designed for wet outdoor conditions.
Low voltage does not mean that every component is interchangeable. The transformer, fixtures, cable, connectors, and controls must be compatible. Some systems may also be polarity-sensitive, so installers should follow the wiring diagram supplied by the manufacturer.
What Tools and Materials Will You Need?
Before beginning, gather the transformer, compatible LED fixtures, landscape cable, outdoor-rated waterproof connectors, wire strippers, screwdrivers, mounting hardware, a small shovel or flat spade, measuring tape, and layout markers.
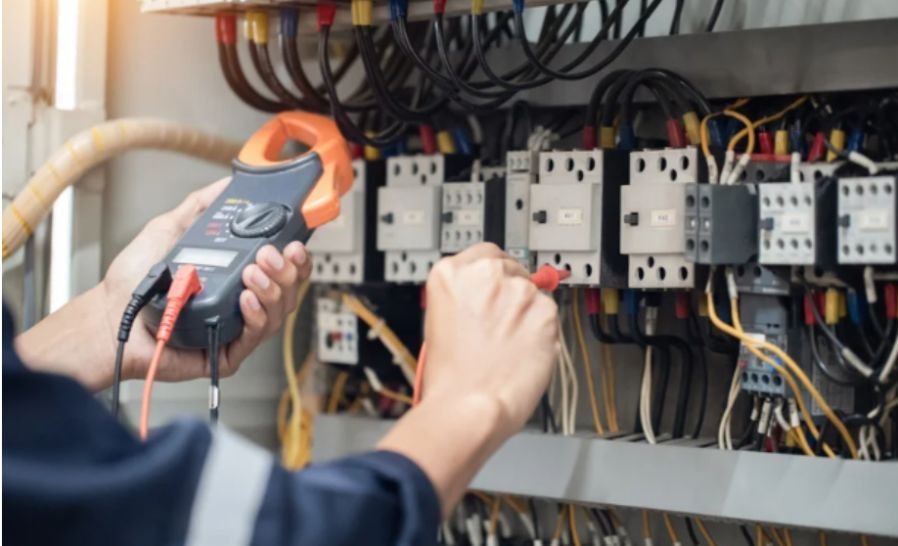
A multimeter is also useful for checking voltage at fixtures, especially on long cable runs. Use cable listed for landscape lighting and underground installation rather than ordinary indoor electrical wire. Connections that will be buried or exposed to moisture should use connectors approved for that environment.
How Do You Plan the Lighting Layout?

Start by walking through the landscape during the day and again after sunset. Mark the areas that need safe visibility, such as entrances, steps, pathways, and changes in elevation. Then identify trees, walls, planting beds, or architectural details that deserve accent lighting.
For areas where lighting is also used around home workspaces, understanding the best color temperature for home office lighting can help you choose a more suitable light quality.
Sketch the building, outdoor outlet, transformer position, fixture locations, and approximate cable routes. Keep cable away from areas where edging tools, aerators, or future construction could damage it. Before digging, contact the appropriate utility-location service and identify private irrigation lines or other buried systems that may not be marked.
Avoid lining a walkway with fixtures placed directly opposite one another. Staggered placement usually produces a softer appearance. Position spotlights carefully so they illuminate the intended feature without shining into windows, neighboring properties, or people’s eyes.
How Do You Choose the Correct Transformer Size?
Add the wattage of every fixture connected to the transformer. If ten LED fixtures consume 5 watts each, the connected load equals 50 watts. Select a transformer that can operate that load while remaining within the manufacturer’s recommended capacity.
Allowing additional capacity can accommodate voltage loss and future expansion, but an unnecessarily oversized transformer may not always be appropriate. Follow the manufacturer’s minimum and maximum loading requirements rather than relying on one universal percentage.
Choose an outdoor-rated transformer made for the intended installation location. It should be mounted securely, remain accessible for maintenance, and connect to a properly protected outdoor receptacle. Never use an indoor transformer outdoors.
Which Landscape-Lighting Cable Should You Use?
Cable selection depends on the total fixture load, run length, wiring layout, transformer output, and product requirements. Common residential systems use 12/2 or 14/2 landscape cable. A lower gauge number indicates a thicker conductor, which generally handles greater loads and reduces voltage loss over longer distances.
A simple line of nearby LED fixtures may work well with 14-gauge wire. Long runs, heavier loads, and larger systems may require 12-gauge or thicker cable. Dividing a large installation into several shorter zones can also improve performance.
Daisy-chain wiring is easy because fixtures connect successively along one cable. However, voltage can fall toward the end of a long run. Hub, T, or separate home-run configurations may provide more balanced voltage across widely separated fixtures.
How to Install the Fixtures Step by Step

1. Position the Fixtures Temporarily
Assemble the lights according to their instructions and set them at the marked locations.
Following how to plan a landscape lighting layout beforehand makes it easier to position each fixture according to its intended purpose, coverage, and viewing angle.
Do not fully drive the stakes into hard soil because force can bend or break them. Loosen compacted ground first and confirm that each fixture remains upright.
2. Mount the Transformer
Install the transformer in an accessible, ventilated location near the appropriate outdoor outlet. Maintain the clearance required by its instructions. Do not place it directly on the soil, hide it in vegetation, or cover it with materials that could trap heat.
Keep the transformer unplugged while making cable and fixture connections. Work only on the low-voltage side unless qualified to perform other electrical work.
3. Lay Out the Landscape Cable
Run the cable from the transformer to the fixtures while leaving it above ground. Follow the planned route and provide modest slack at each fixture so future repositioning remains possible. Avoid sharp bends, excessive tension, and damage to the insulation.
4. Make Waterproof Connections
Attach each fixture using its approved connector system. Some quick-connect fittings pierce the cable insulation, while other fixtures require stripping and joining conductors. Follow the supplied wiring diagram and make sure no exposed copper remains outside the connector.
Use connectors listed for outdoor wet locations or direct burial when appropriate. Electrical tape can add mechanical protection, but it should not replace a properly rated waterproof connector.
5. Connect and Test the System
Connect the main cable to the transformer terminals as directed. Inspect every connection, plug in the transformer, and switch on the system. Confirm that all fixtures operate before burying any cable.
Check the farthest fixtures for reduced brightness. When necessary, measure their voltage with a multimeter and compare the reading with the fixture’s approved operating range. Correct cable size, transformer taps, run layout, or connections before proceeding.
6. Adjust the Lights After Dark
Nighttime adjustment reveals glare, uneven spacing, harsh shadows, and misplaced beams. Aim path lights toward walking surfaces and direct accent lights precisely at the intended tree, wall, or architectural feature. Small changes in angle can substantially improve the finished effect.
7. Bury and Document the Cable
Bury the cable only after testing and adjustment. Required depth can vary according to the product listing, installation location, exposure to physical damage, and local rules. Follow the manufacturer’s instructions and applicable electrical requirements instead of assuming one depth suits every project.
Record the cable route on the property sketch and take photographs before covering it. This documentation can prevent accidental damage during future planting, edging, or irrigation work.
Why Are Some Landscape Lights Dim or Not Working?

If every fixture is off, check the outlet, GFCI protection, transformer settings, timer, photocell, and main cable connection. If only one fixture fails, inspect its lamp, connector, and cable section.
Lights that become progressively dimmer along a run often indicate voltage drop. Possible remedies include shortening the run, using thicker cable, dividing fixtures among separate runs, balancing their loads, or using the correct transformer output tap. Corrosion and loose connections can produce similar symptoms.
Frequently Asked Questions
1. Can I install low-voltage lighting myself?
Many homeowners can install a compatible plug-in system. Hire a qualified electrician when a new outlet, household-voltage wiring, panel work, wall penetration, permit, or code-sensitive alteration is required.
2. How deep should landscape-lighting cable be buried?
There is no single depth for every installation. Follow the cable listing, equipment instructions, local requirements, and any rules applying to locations exposed to tools, traffic, or physical damage.
3. How many fixtures can one transformer support?
That depends on the transformer’s usable capacity and the combined wattage of the fixtures. Cable length, wire gauge, voltage drop, and possible future expansion also affect the design.
4. What is the safest way to learn how to install low-voltage landscape lighting?
Read the complete instructions for the transformer and fixtures, plan every cable run, locate buried utilities, use approved outdoor components, and test the system before burying the cable.
Final Thoughts
I believe the most successful landscape-lighting projects begin on paper, not in the ground. Careful fixture placement, realistic transformer sizing, suitable cable, waterproof connections, and nighttime testing create a system that looks intentional and remains easier to maintain.
I would never rush the planning stage or treat low voltage as permission to ignore electrical precautions. When the products, property conditions, or local requirements exceed my experience, bringing in a qualified professional is the safest decision.





2 thoughts on “How to Install Low-Voltage Landscape Lighting Without Costly Mistakes”